Today we’re cutting the spindle hole in the toolpost clamp for the toolpost grinder. This is too much of a hole for my small mill, so we’re going to do it in the lathe.
Options for Material Removal
The first choice to make is to pick a tool to remove the bulk of the material. It would be possible to drill out the block in steps, with a collection of twist drills. I’ve done this before, and you may remember my nemisis, the 57/64″ taper-shank drill.
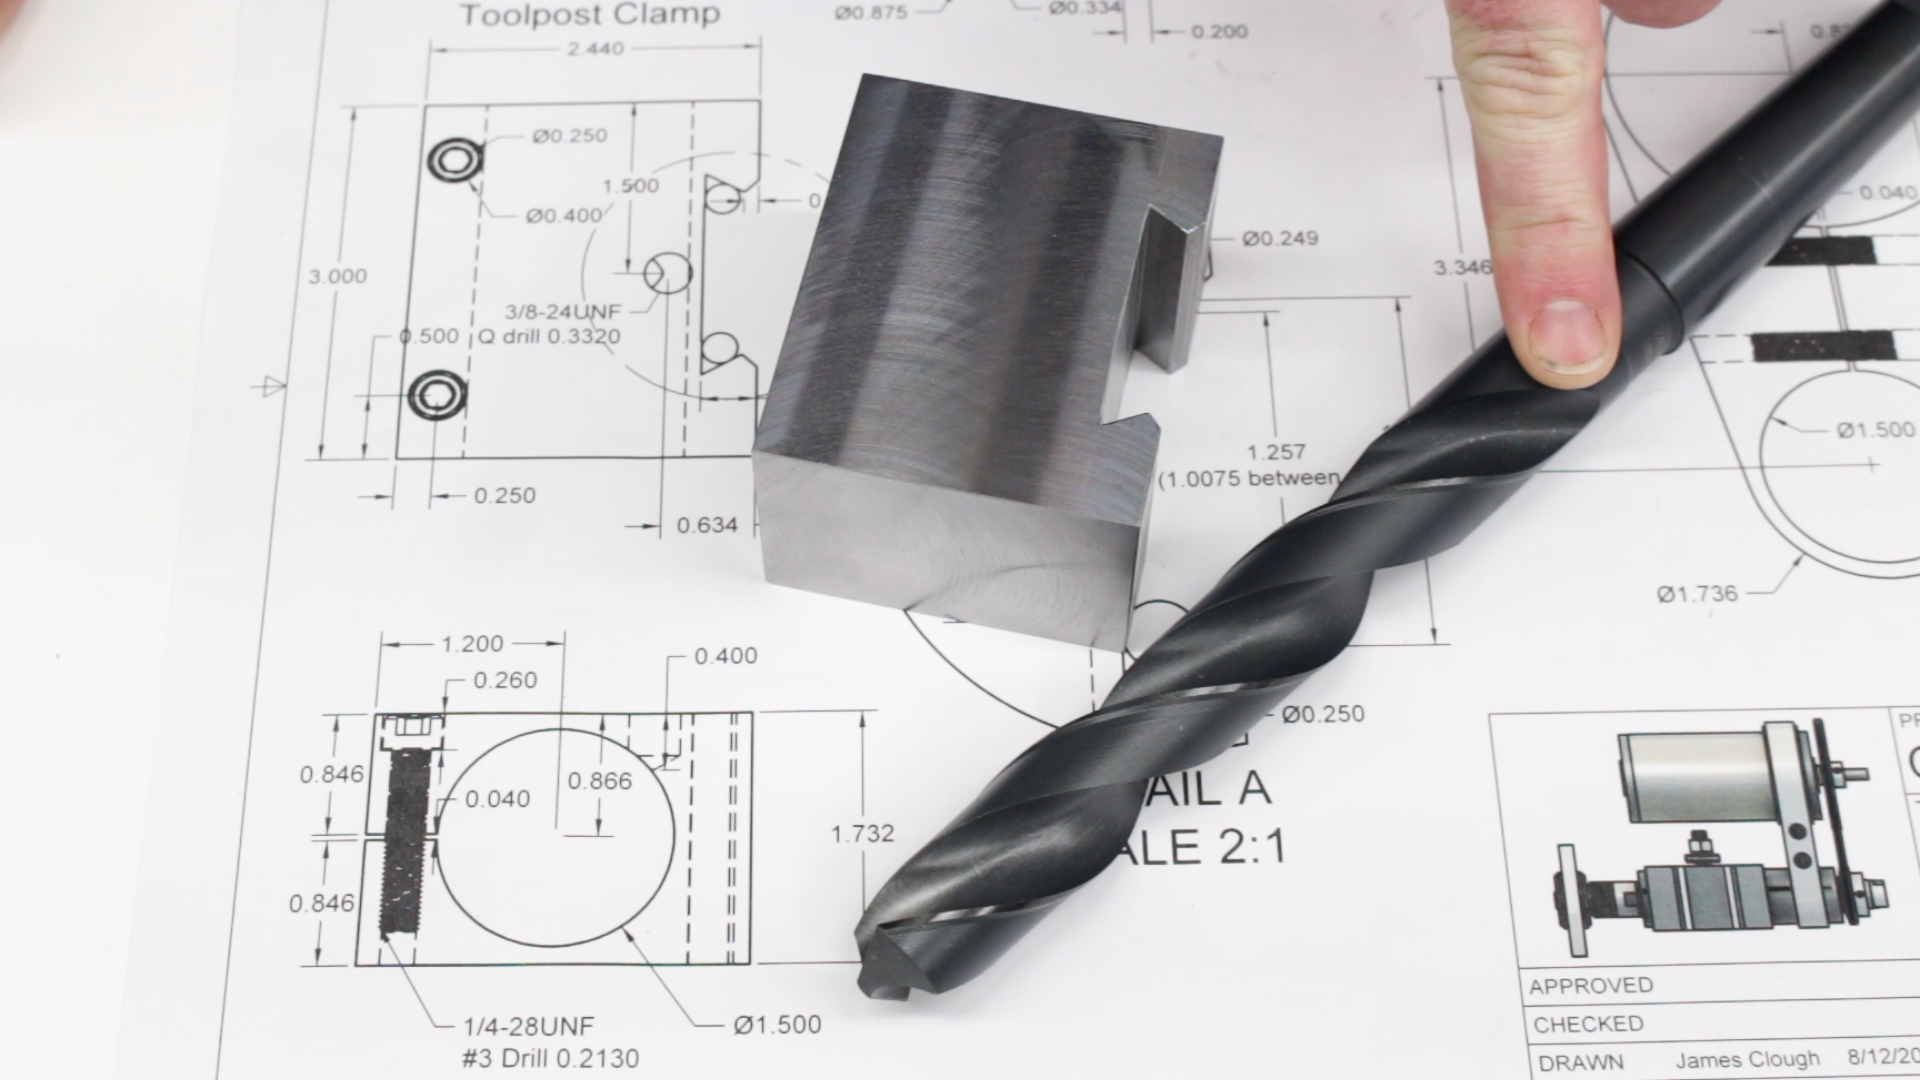
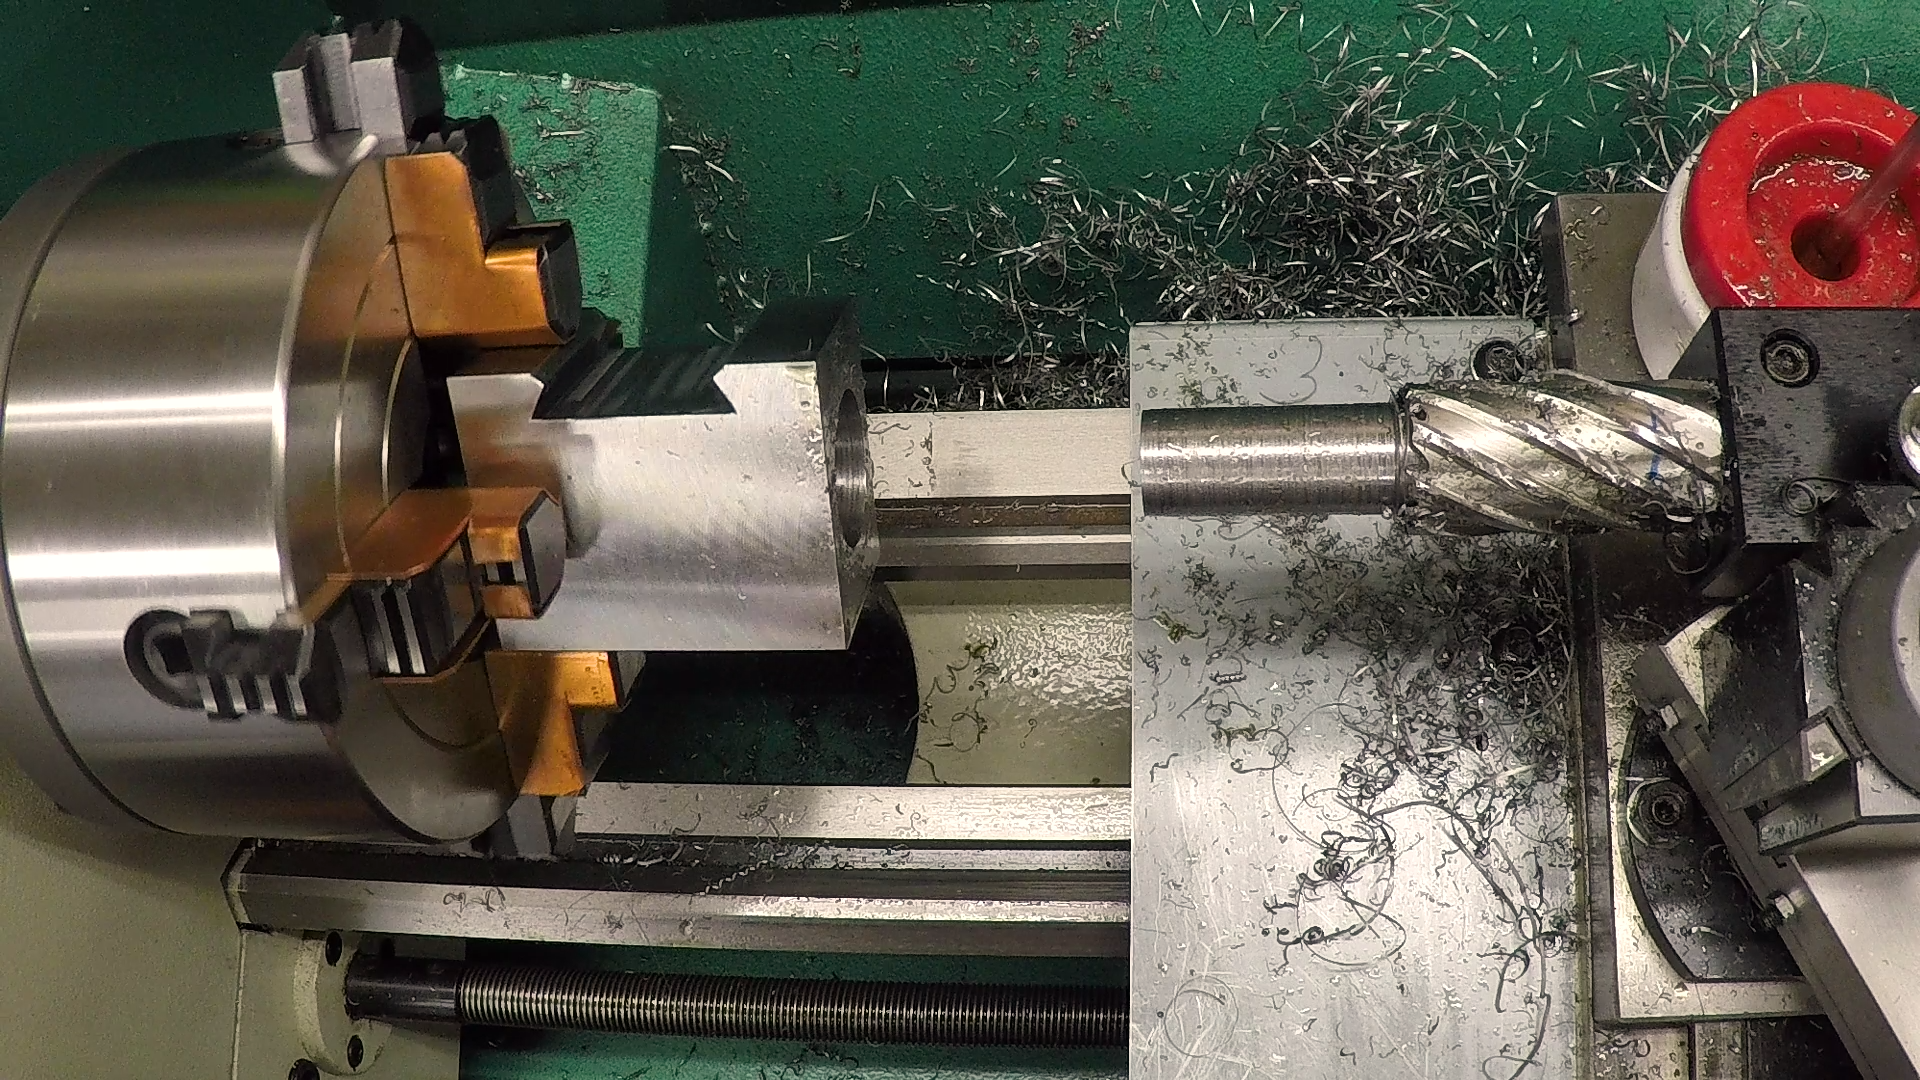
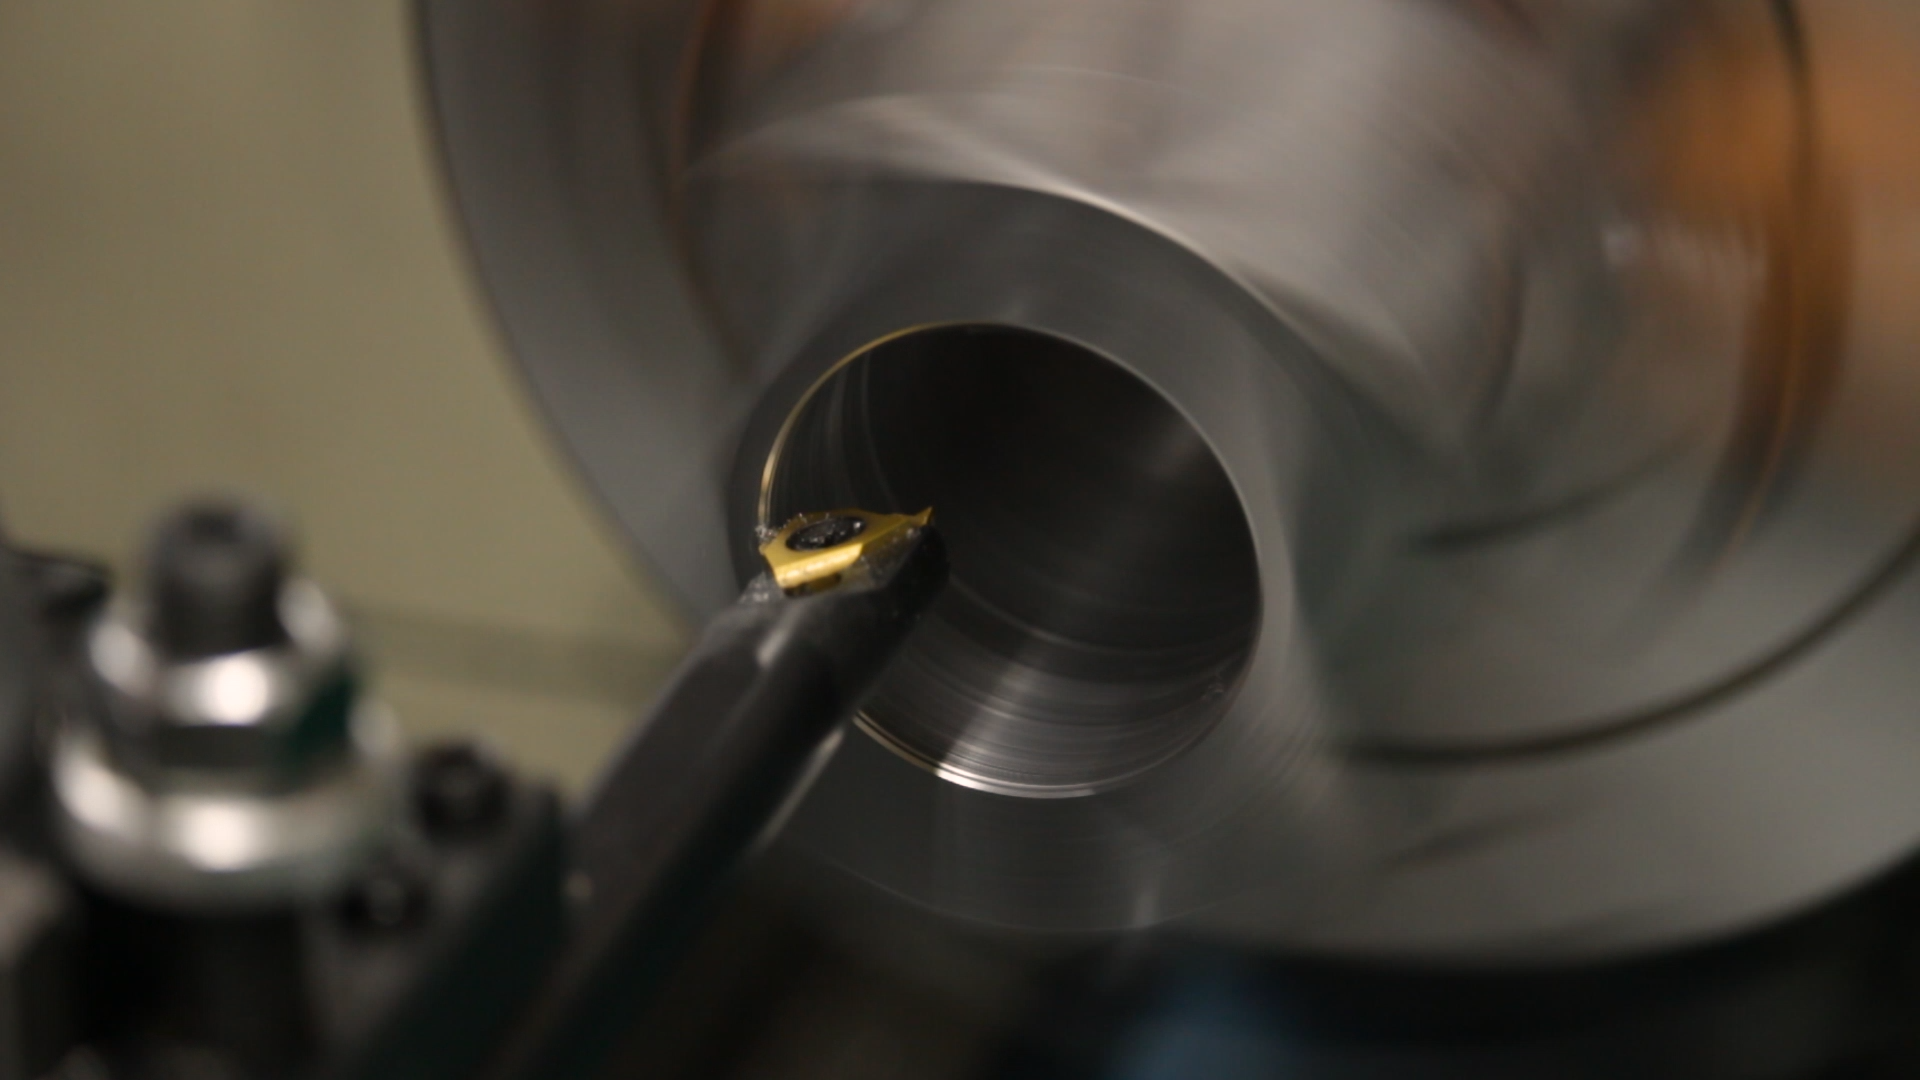
This is really too much drill for my little lathe. It works if you go up in multiple steps, but it takes a long time and makes a lot of chips. This time, I decided to try using a 1-1/4″ annular cutter. An annular cutter, also called a RotaBroach, also called a mag drill, only removes material around the periphery of the hole, leaving a solid slug in the middle. This reduces the torque and horsepower requirements considerably because it doesn’t have to convert all the material in the center into chips.


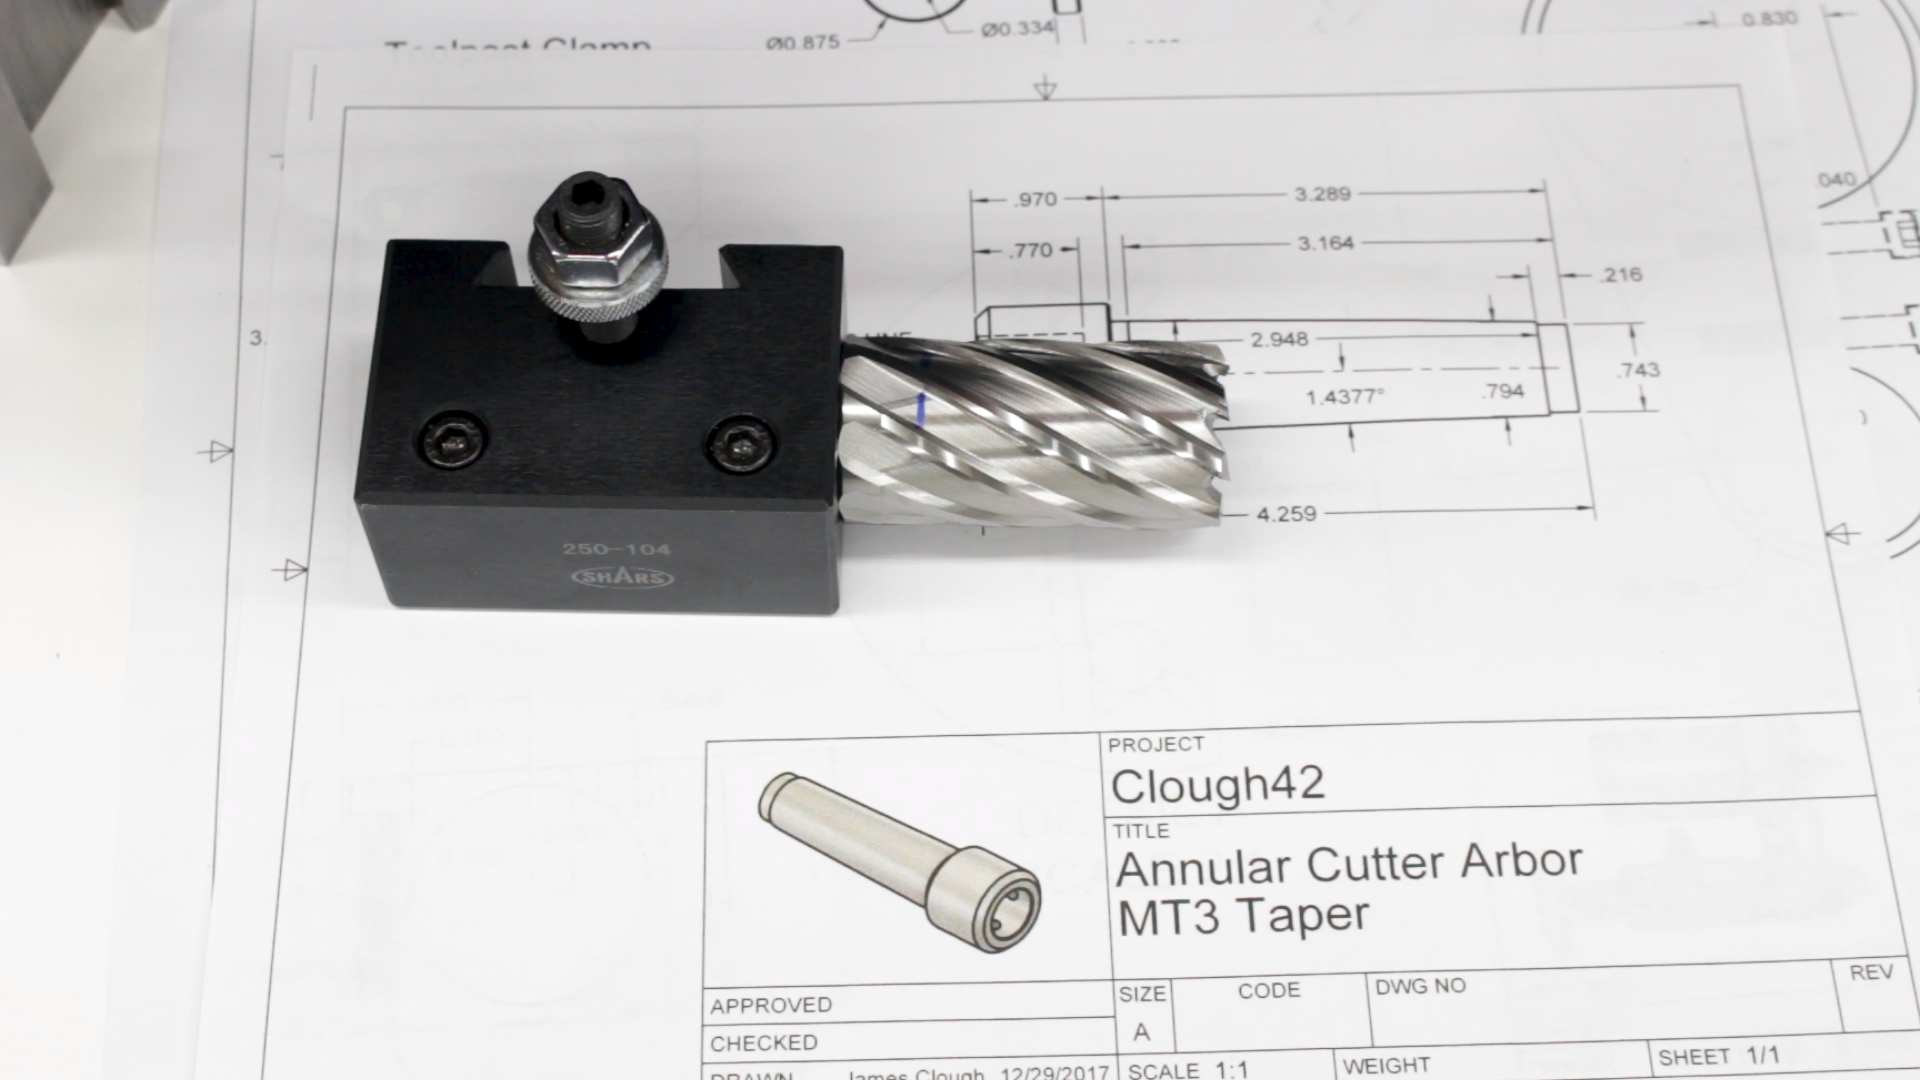
The only hard part is holding the annular cutter in the lathe. It has a 3/4″ shank with two Weldon flats. I briefly considered making a taper-shank arbor for it, but decided not to for two reasons. First, it’s a bunch of complicated work to make it and make it concentric. Second, I hate drilling with the tailstock. It has a short stroke, and I’m going to be cranking it in and out to clear and oil the cutter.
Instead, I discovered that I could mount it directly in a boring bar holder on my toolpost, so I decided to give that a try.
Setting up the Stock
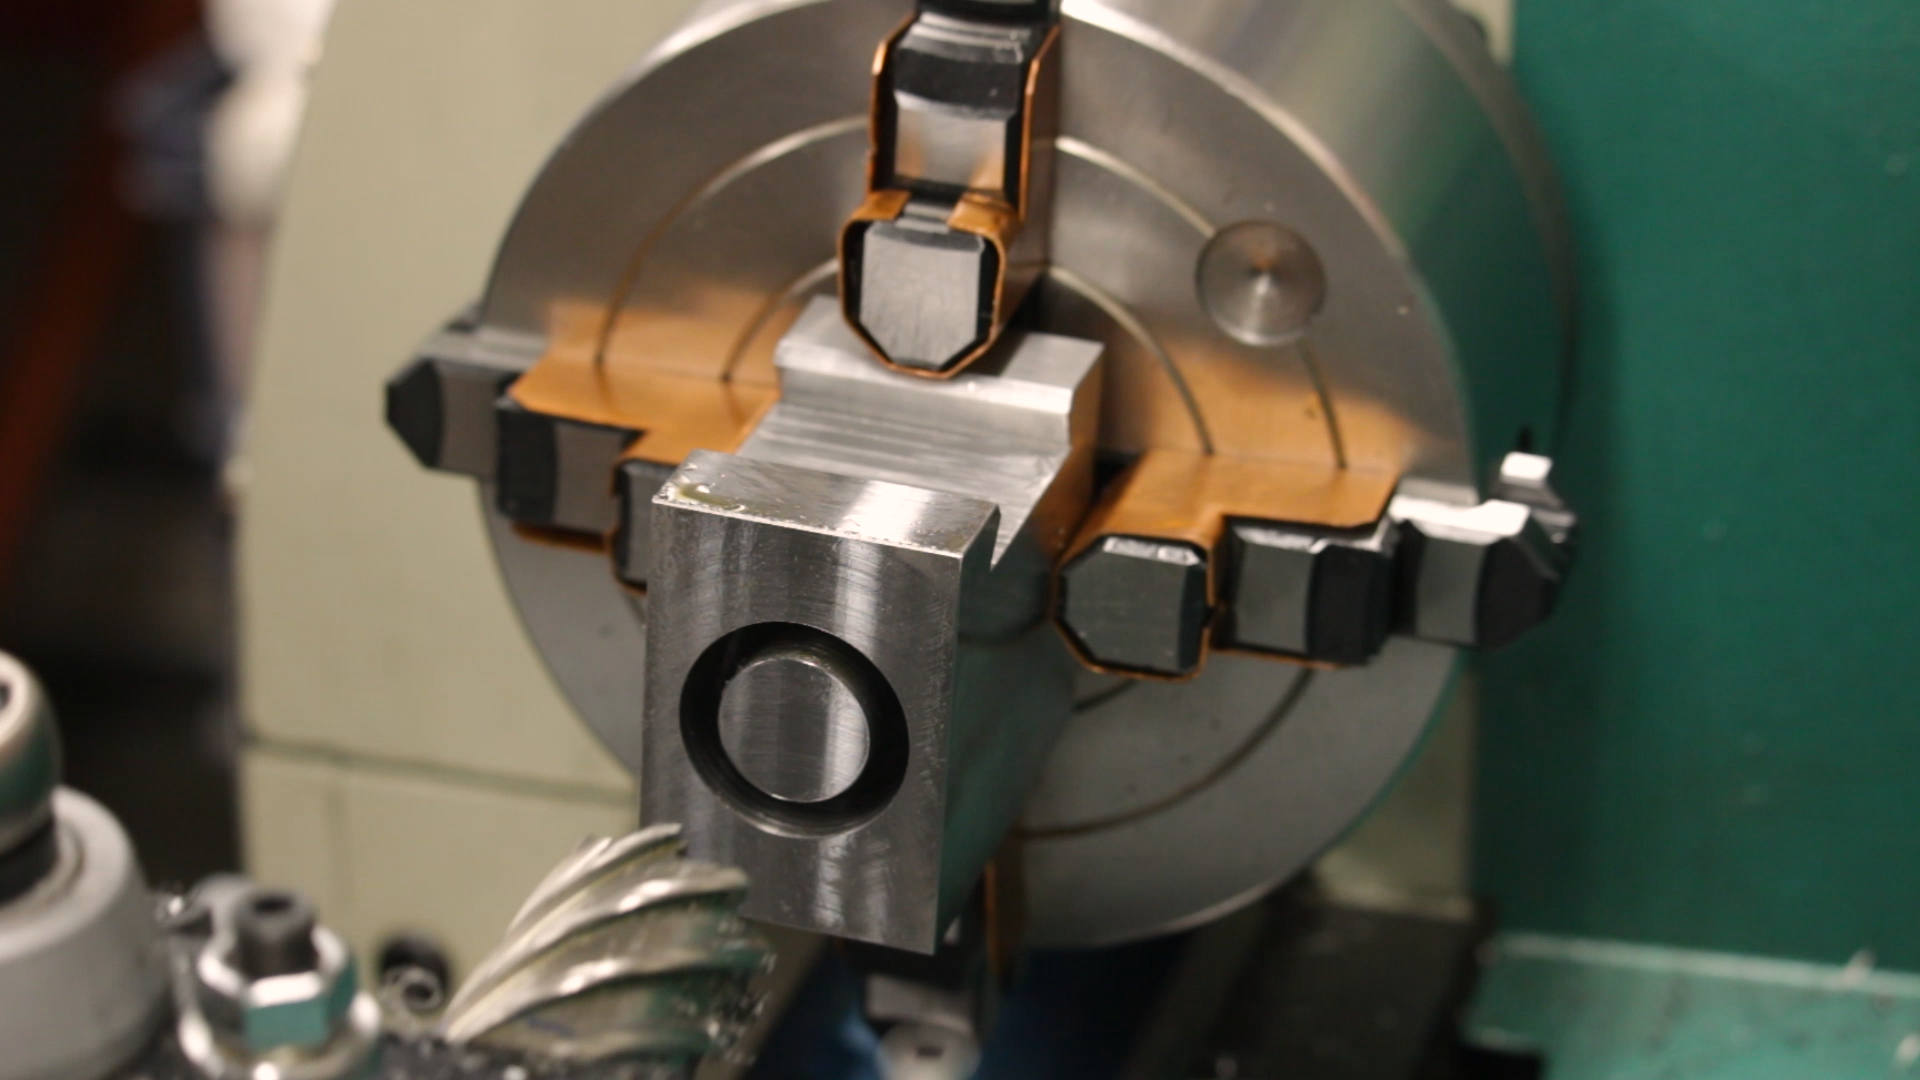
The first step to cutting the hole in the lathe was to set up the stock in the 4-jaw chuck. This was a time-consuming operation, moving the dial indicator back and forth between the sides and the face, slowly dialing and tapping it into position.

Drilling
I had expected to struggle with flex in the toolpost and compound of the lathe, but it turned out to be a non-issue. I just applied a little pressure with the feed handle and the annular cutter did its thing, slicing through the steel like it was nothing.
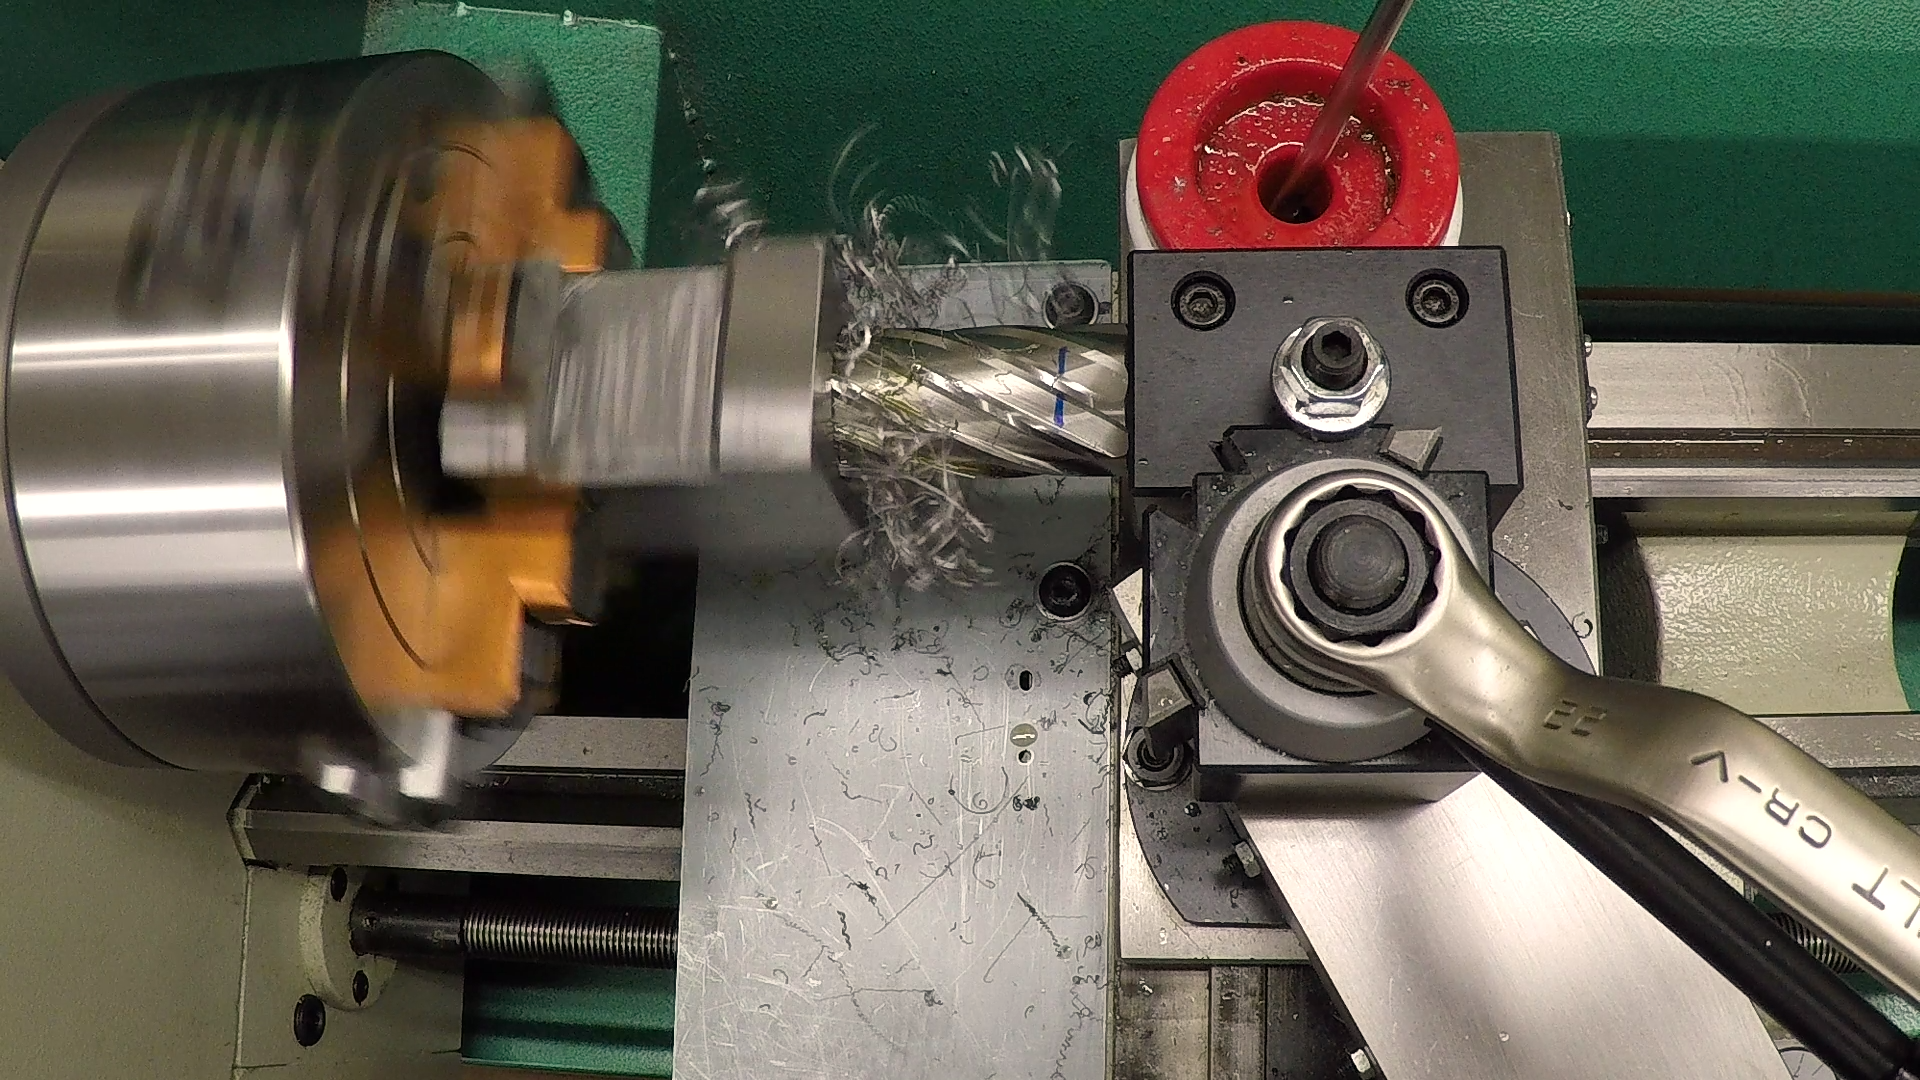

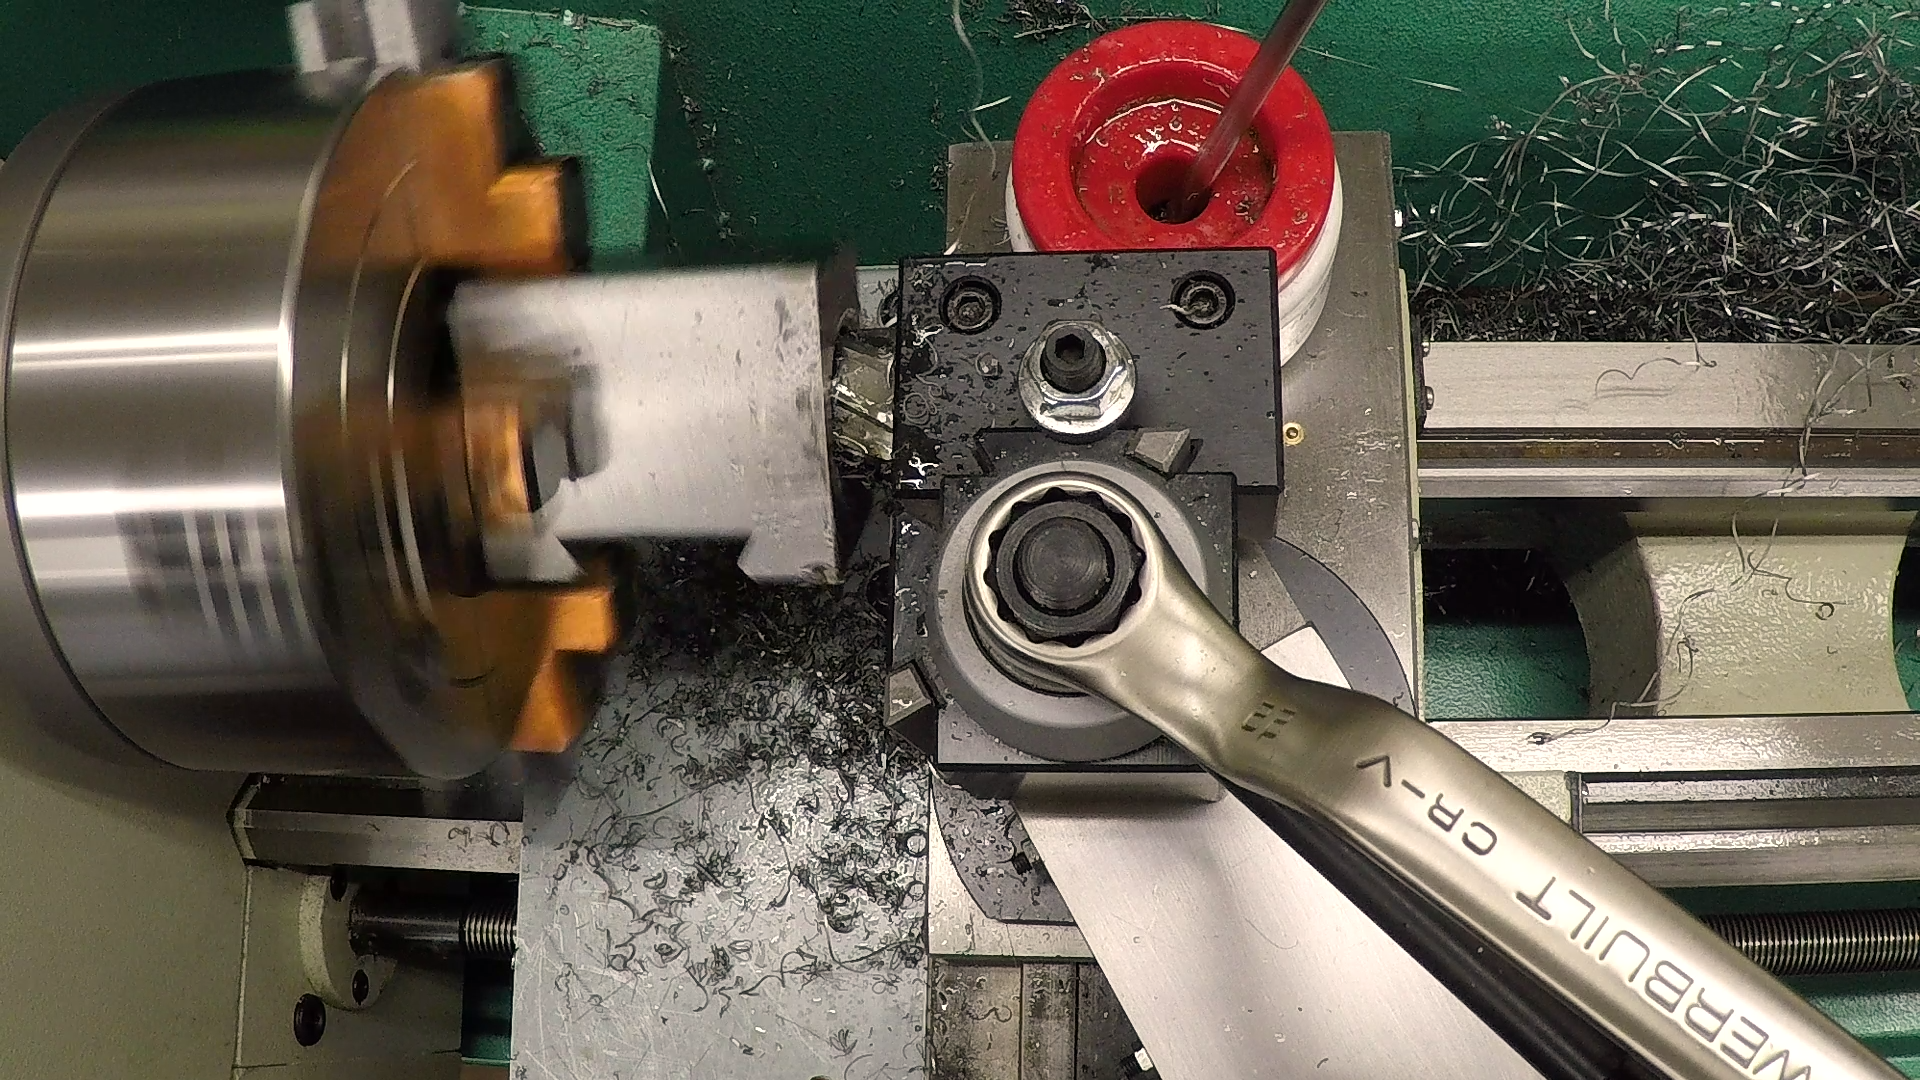
It left a nice, clean groove all the way to its maximum 2″ depth. I flipped the part around, dialed it in again and it completed the cut, lining up perfectly with the cut from the other side. I kept the 3″ long slug and tossed it in my scrap drawer for a future project.
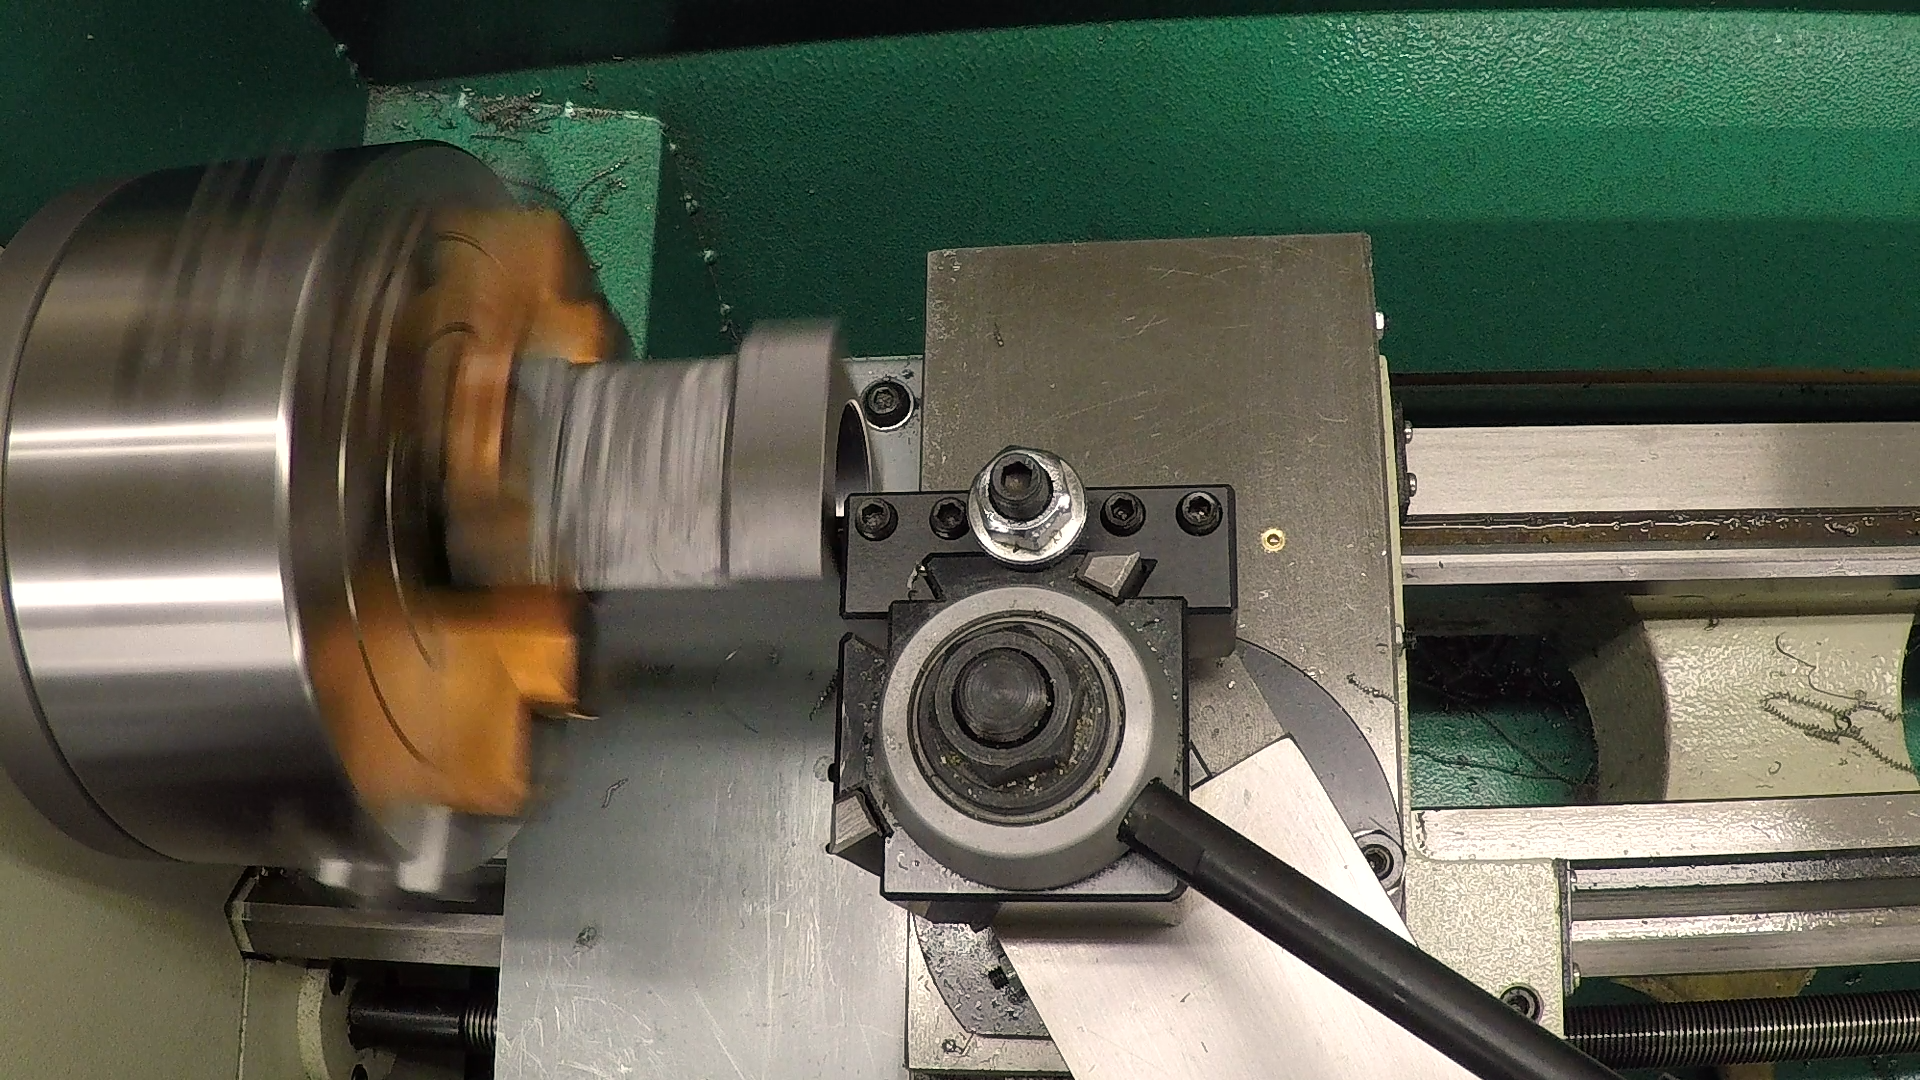
Boring
The next step was to bore the hole to size. This was actually pretty difficult for a couple of reasons. First, since I had already cut the dovetail, the block was unbalanced, so I had to spin it a lot slower than I would have liked. I ultimately ended up turning it at 300RPM, which was just murder on the surface finish with carbide inserts.
Second, I had to stick the boring bar out a little over 3″ to reach all the way through the bore. That’s a lot of stickout on a small lathe. With slow speeds and .020″ cuts at .007″ feed, I ultimately got it to size.
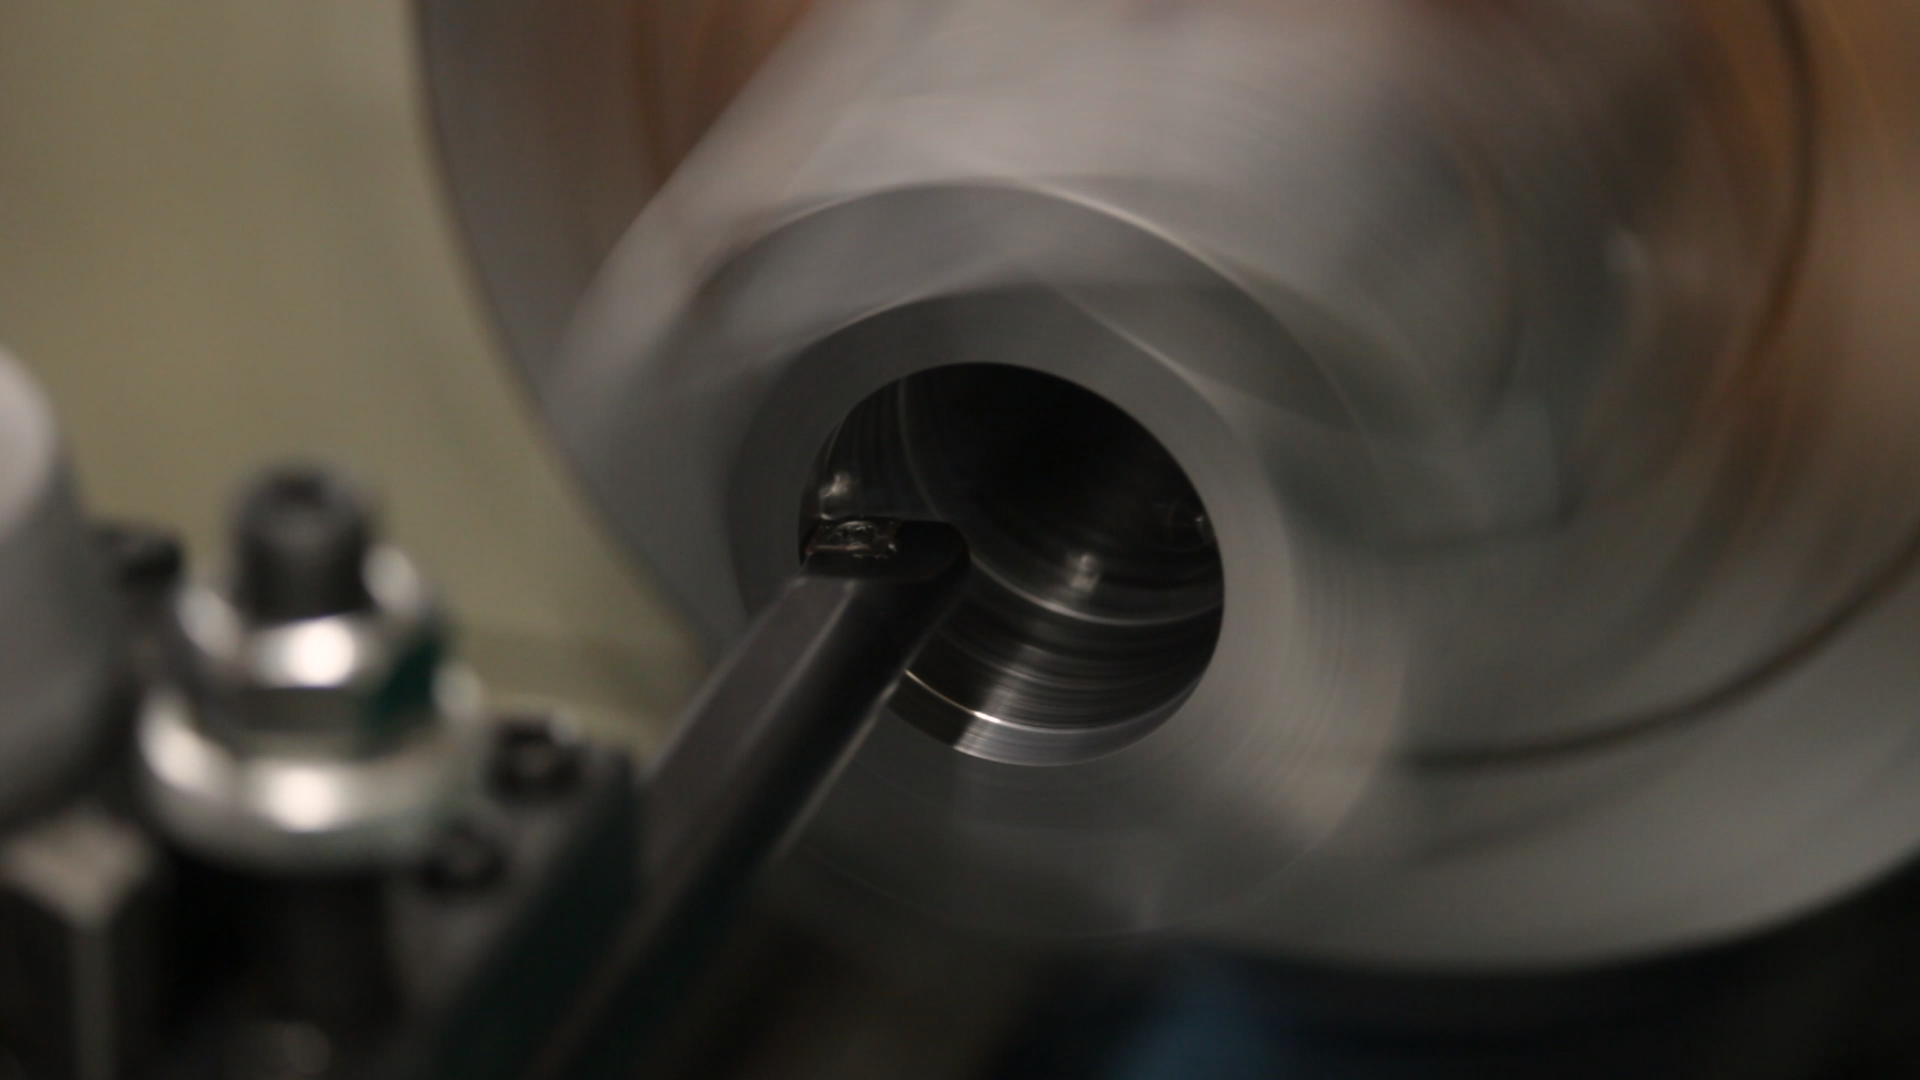

I had to run the bar at a higher angle than I liked because the chips kept coming around in the deep bore and getting caught between the bar and the side wall.
Chamfering
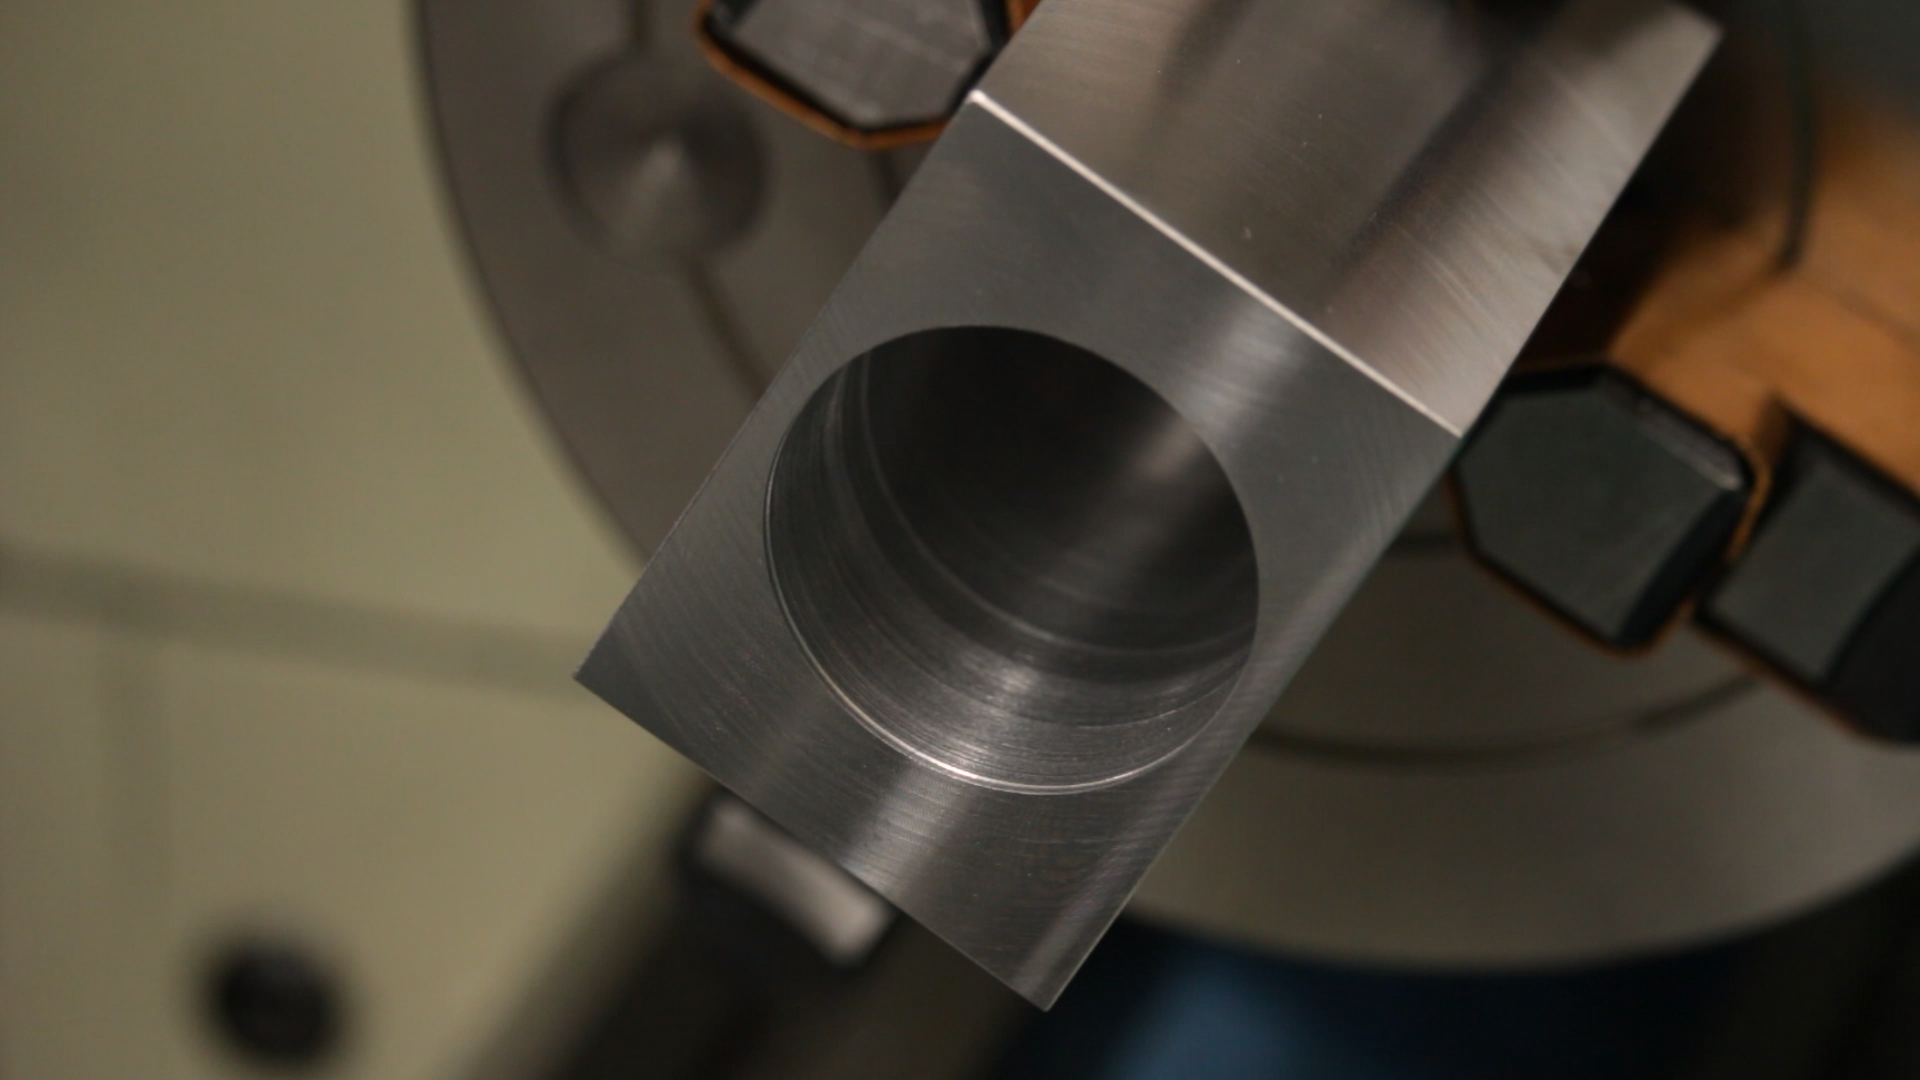
I would normally just grab a chamfer tool and knock a chamfer on the edge of the bore. With this setup, though, that would involve flipping the part around and dialing it in again–something I didn’t want to do. So I just used a threading bar to chamfer the front edge and then reach all the way through the bore to chamfer the other end.
Next Steps
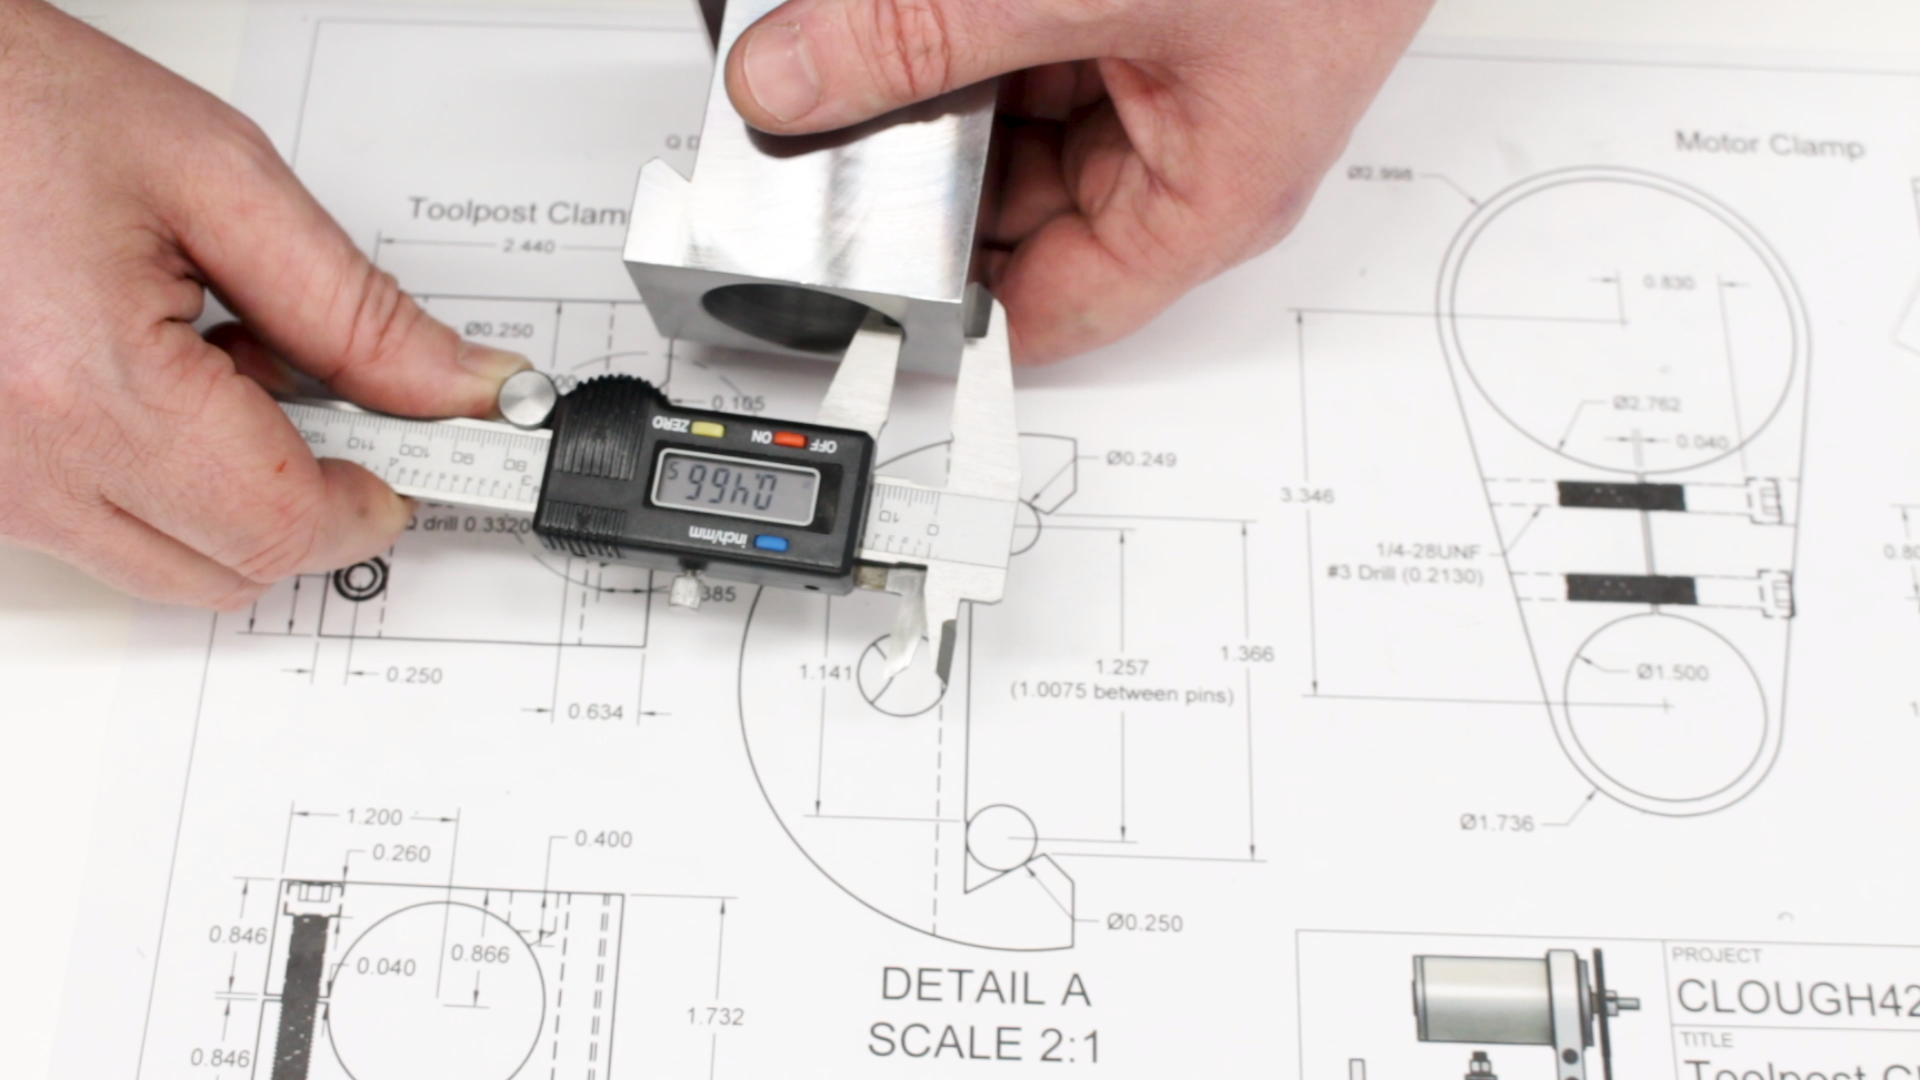
In the end, it turned out fine. I don’t like the surface finish inside the bore, but it fits and nobody will be able to see it once it’s assembled. I measured the thickness of the web on all four sides of the finished block, and remarkably it’s within .001″ of centered in every direction. That’s not bad for a $1000 benchtop lathe and a $7 dial indicator!
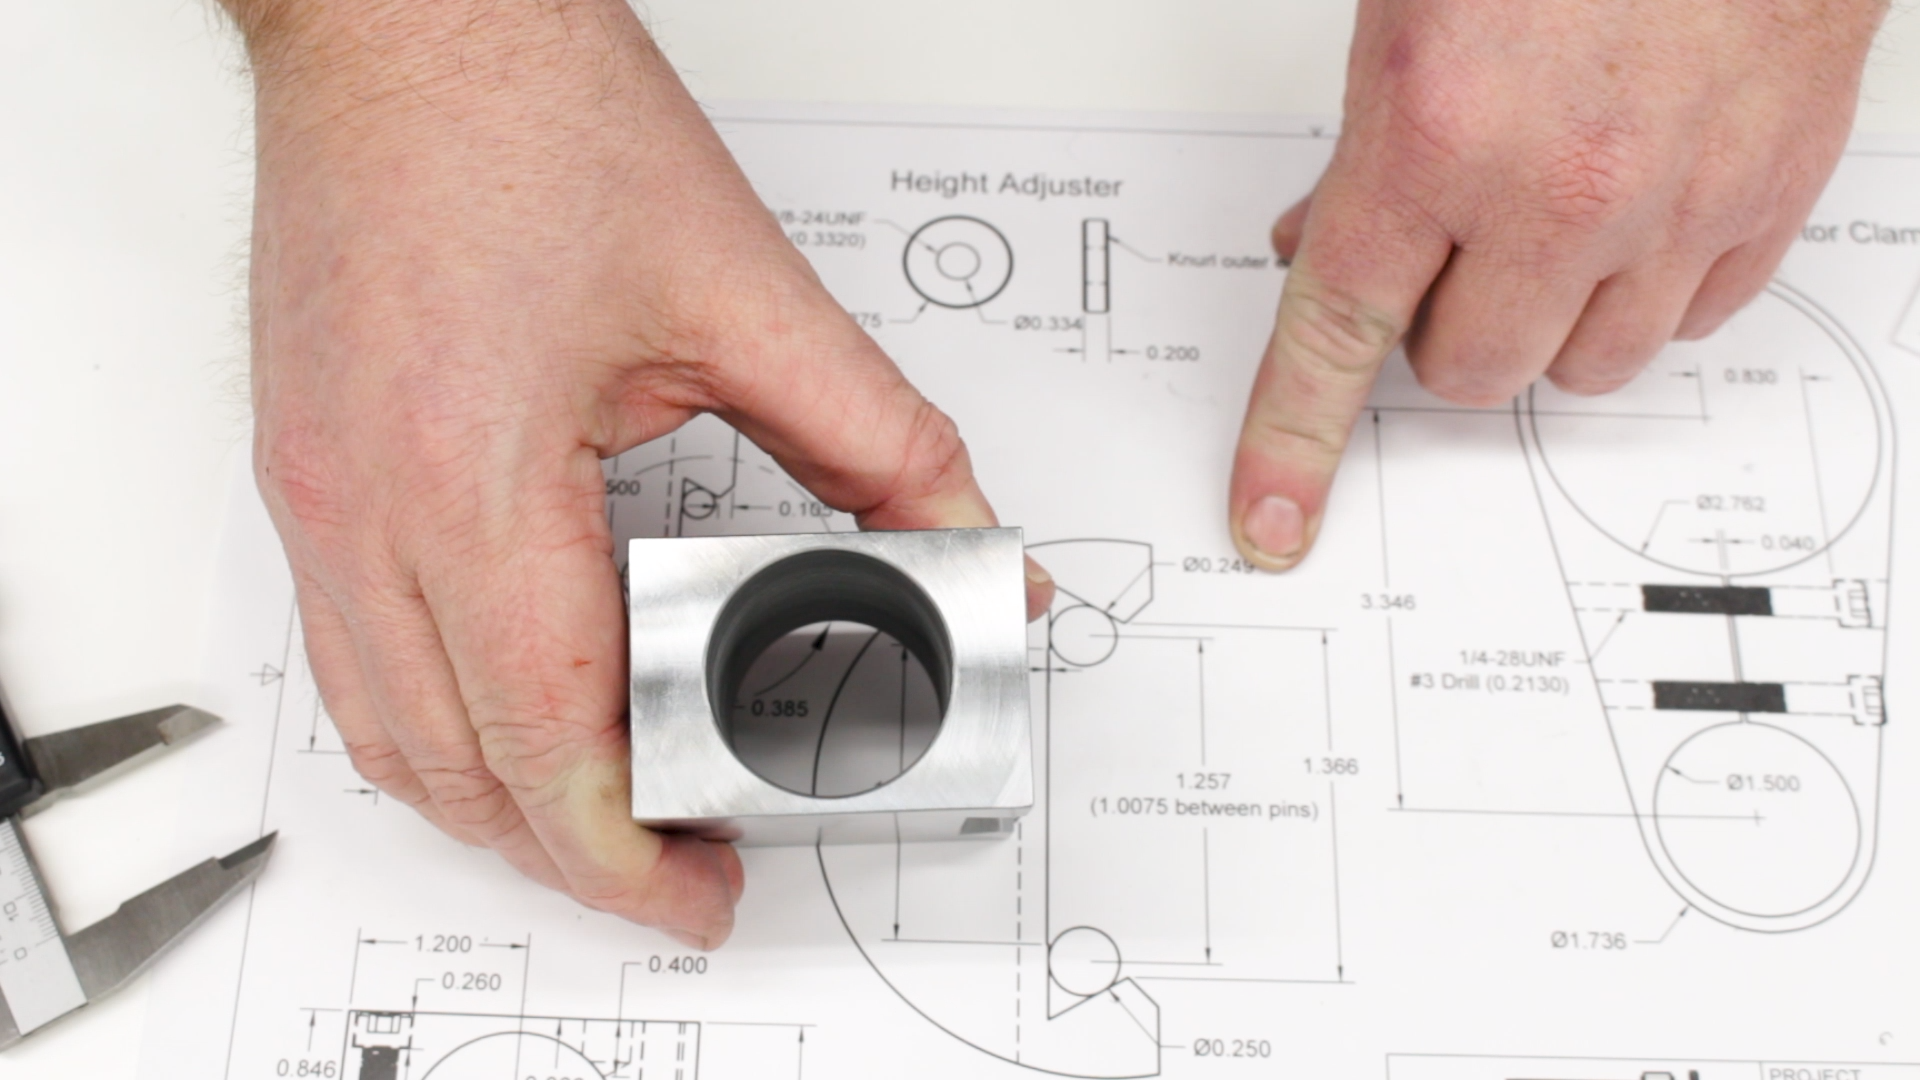
Next time, we’ll drill and tap the holes for the clamping screws and the height adjuster screw and slit the block so it actually becomes a clamp.
If you’re following along with the build, here are some links to some of the tools used in the video:
*This site contains affiliate links for which I may be compensated
- Steel Dragon 1-1/4″ x 2″ HSS Annular Cutter (Amazon*): http://amzn.to/2BluZ4y
- Shars AXA Quick Change Tool Post Set (eBay*): https://goo.gl/sjsf9N
- 12mm CCMT0602 boring bar (eBay*): https://goo.gl/tJj6Xj
- Carbide internal threading bar (eBay*): https://goo.gl/azQcdj
- Shars 0-6″ .0001″ micrometer set (eBay*): https://goo.gl/vvgJ9A


